
Pay a Bill
Make electronic payments or send a check via Pay a Bill.
Want to keep all your bills in one convenient place? You can make all your payments each month through Pay a Bill in digital banking.
Instructions
Pay a Bill can be found under Pay & Transfer in the main menu of digital banking.
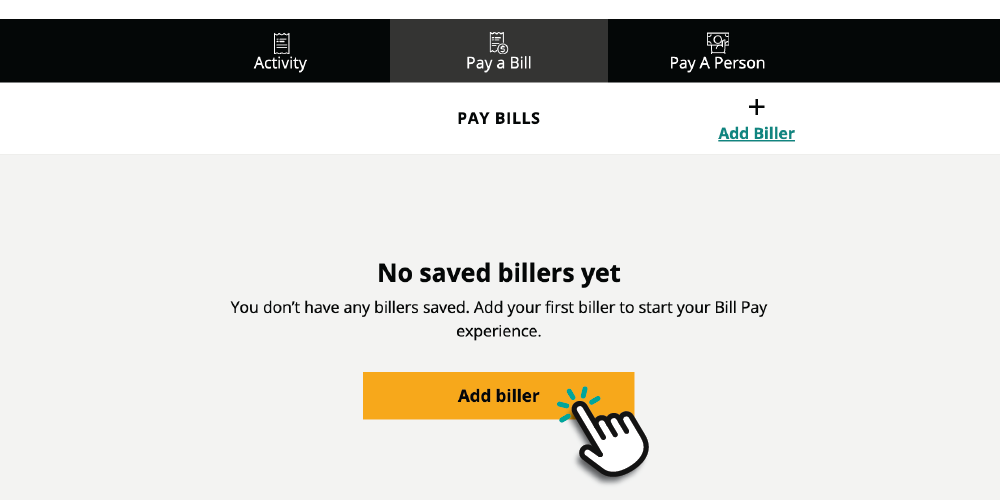
1. On the Pay a Bill tab, Click Add Biller.
2. Type the name of your biller into the search bar.
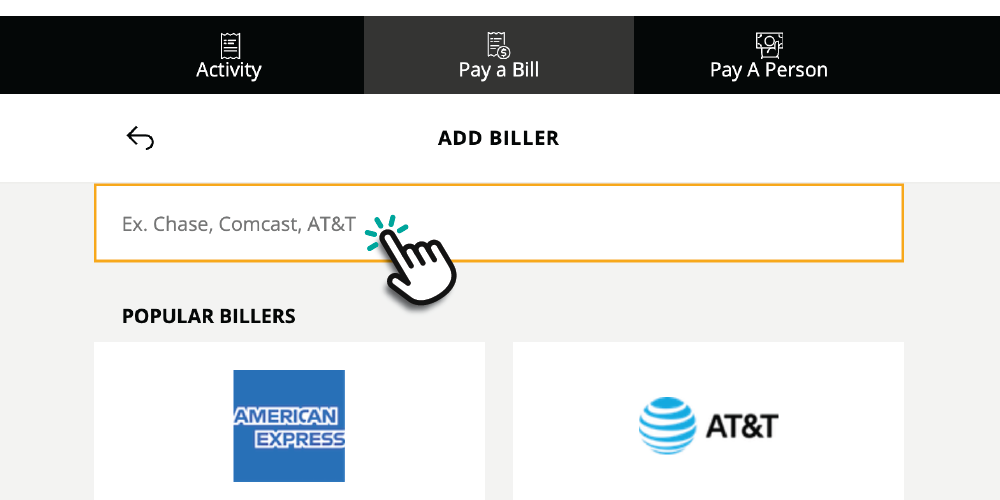
3. If you see a match in the drop-down box, select the correct biller and follow the steps to log into your account.
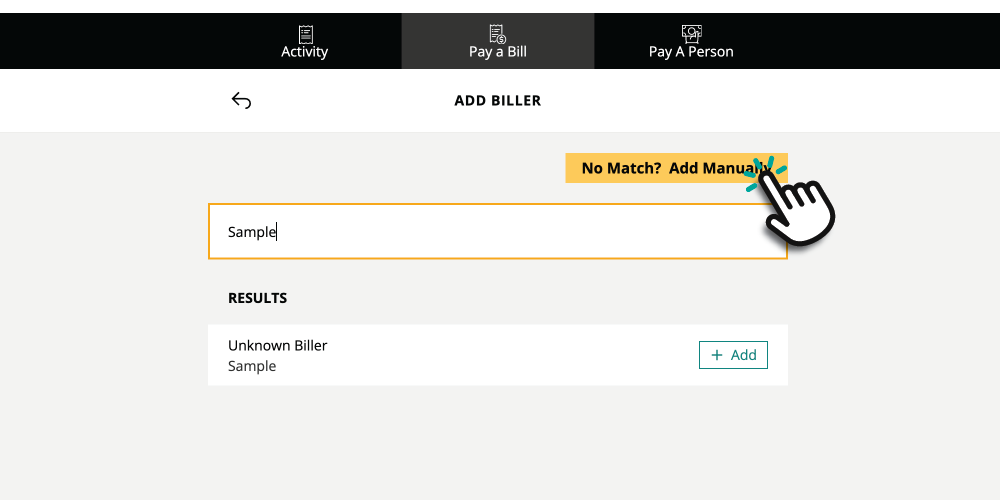
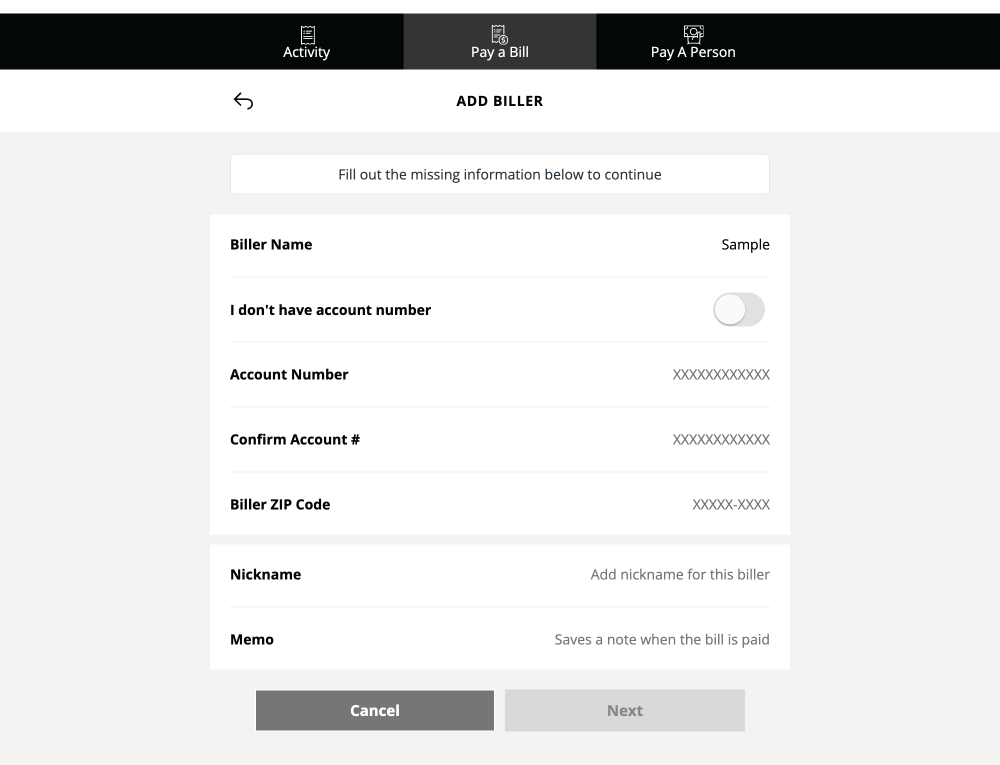
4. If you do not see your biller in the drop-down box, select Add Manually and fill in the proper information for the biller.
1. Select the biller you want to edit/delete. This will take you to the Biller Details page.
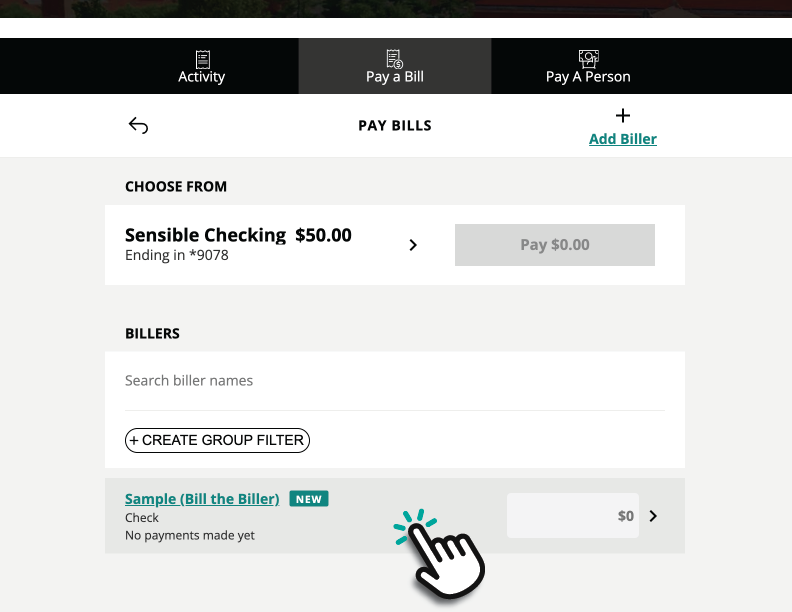
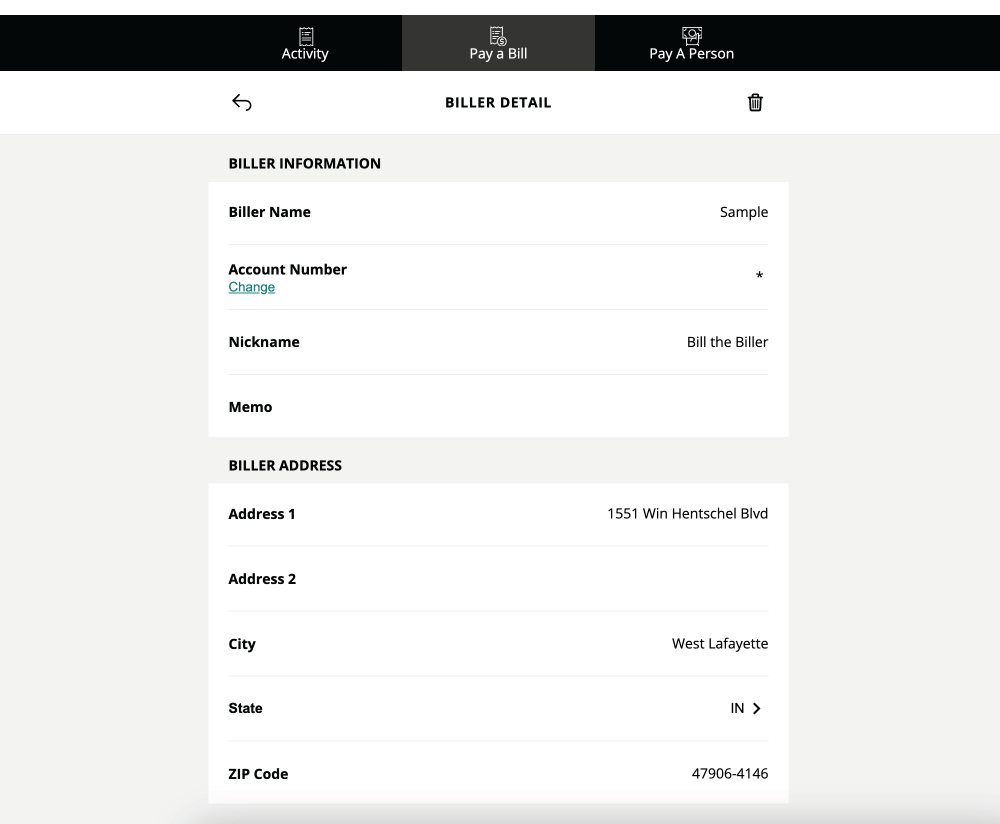
2. Click Update when you’ve finished making edits. If you wish to delete a biller, click the trashcan icon in the top-right of the page.
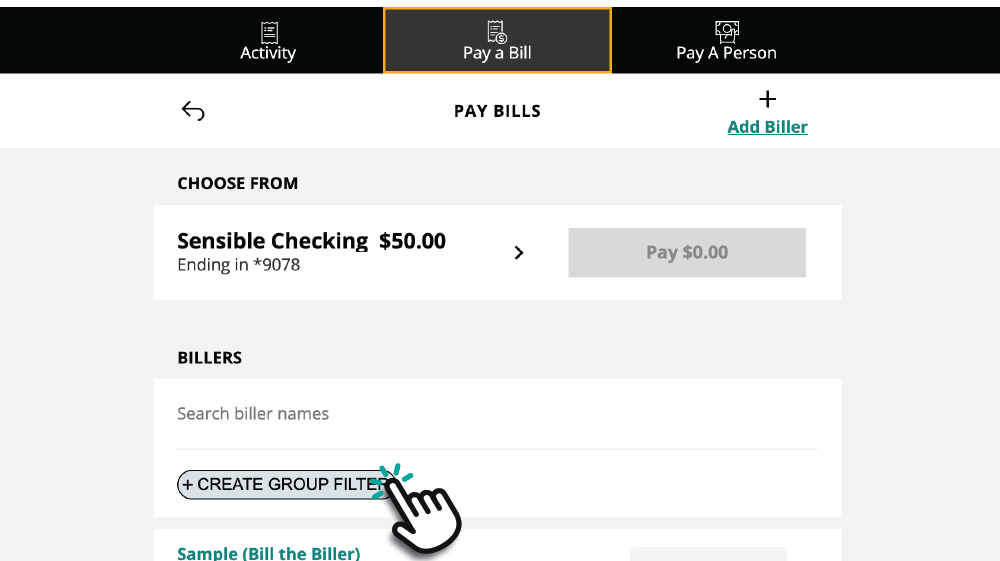
1. In the Pay a Bill tab, select the Create Group Filter button.
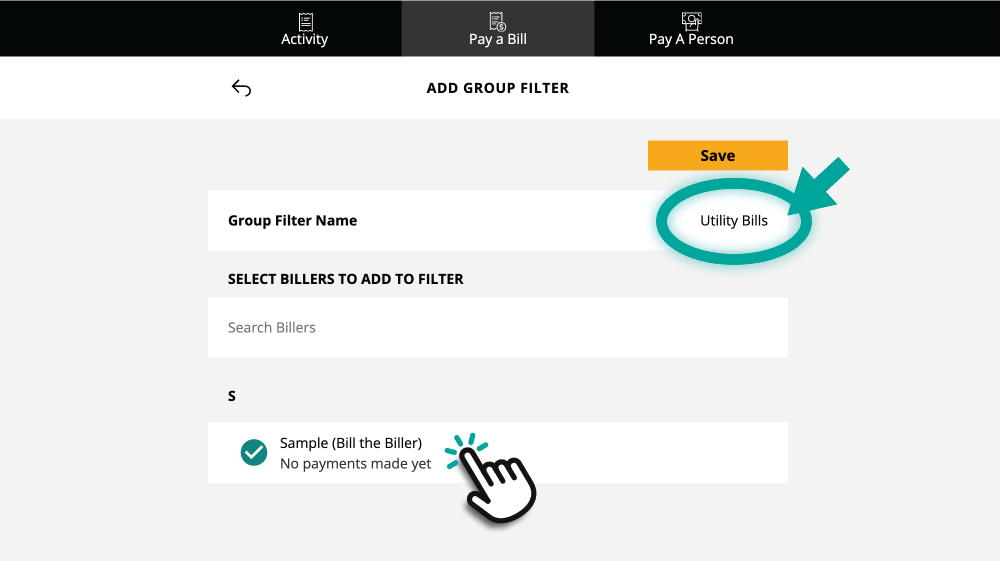
2. Give your group a name. Then select the billers you want in that group. When you're done, click the gold Save button.
3. Now, you can view your biller groups on the Pay a Bill main page.
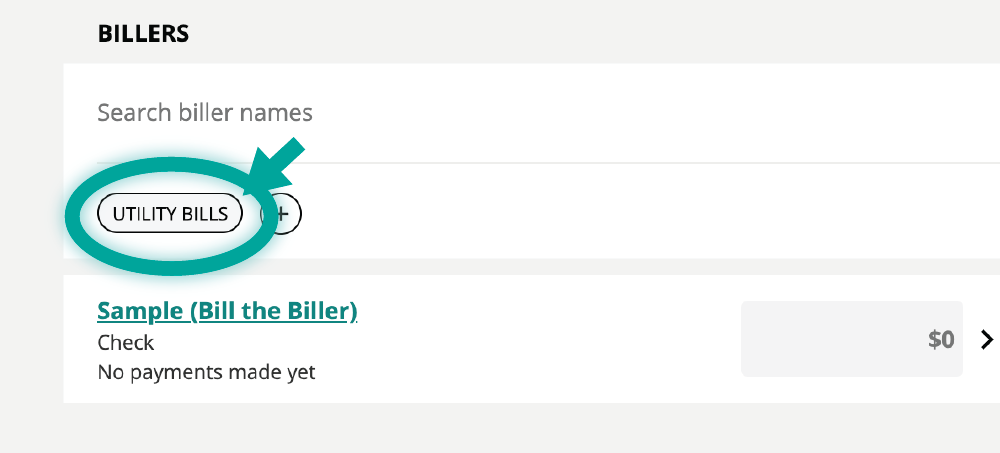
1. On the Pay a Bill tab, find the biller you wish to pay.
2. Next to the biller, enter the dollar amount that needs to be paid.

3. Select the desired Deliver Date. Then click Done.
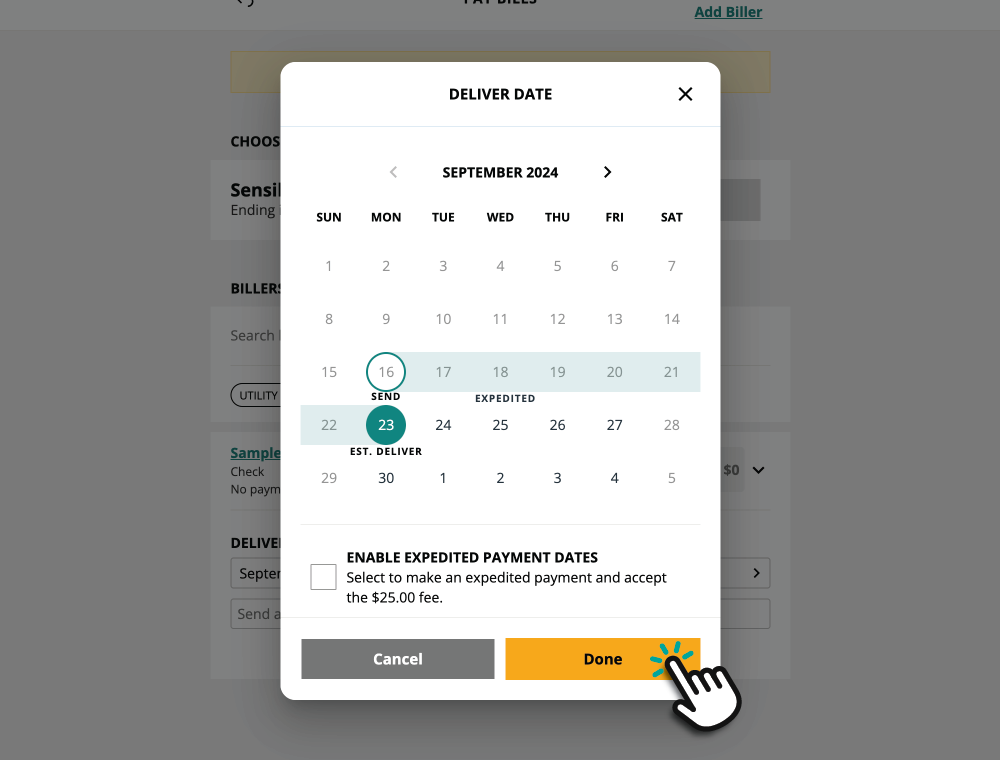
4. Back at the top of the Pay a Bill tab, select the account your wish to pay from and click the gold Pay button.

5. Confirm your payment and then click Done.
6. If you would like to schedule a recurring payment: Select the biller, click the box under Repeats.
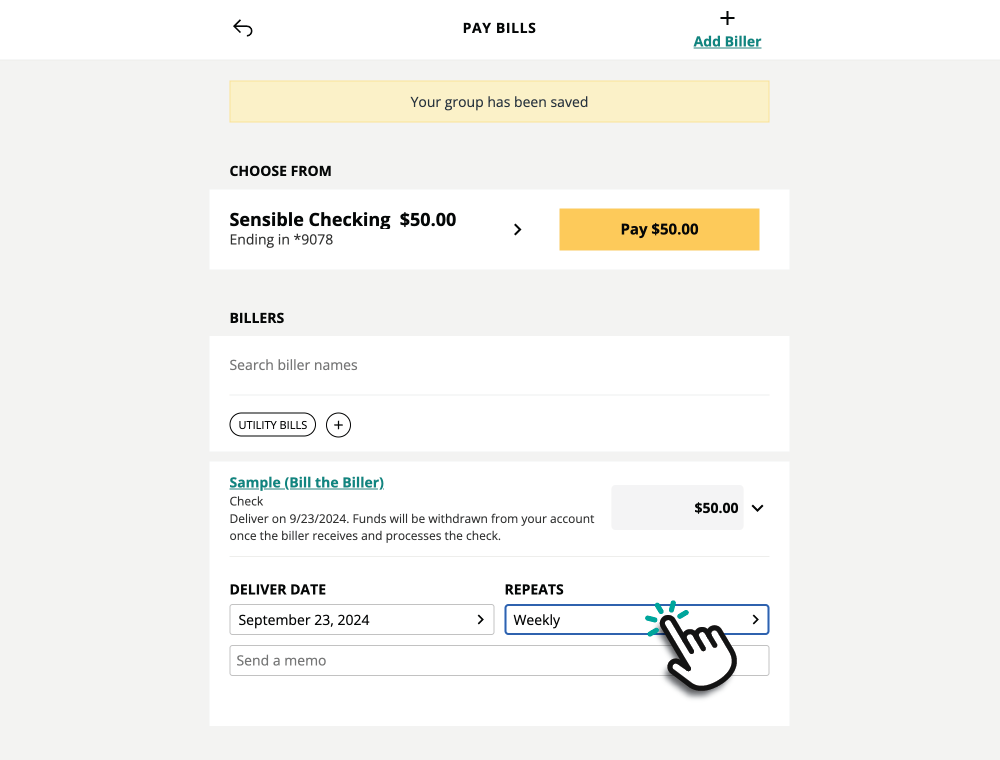
5. Select how often you’d like the payment to repeat. Select Until I cancel, after a number of payments, or an end date for your recurring payment. Then click Done.
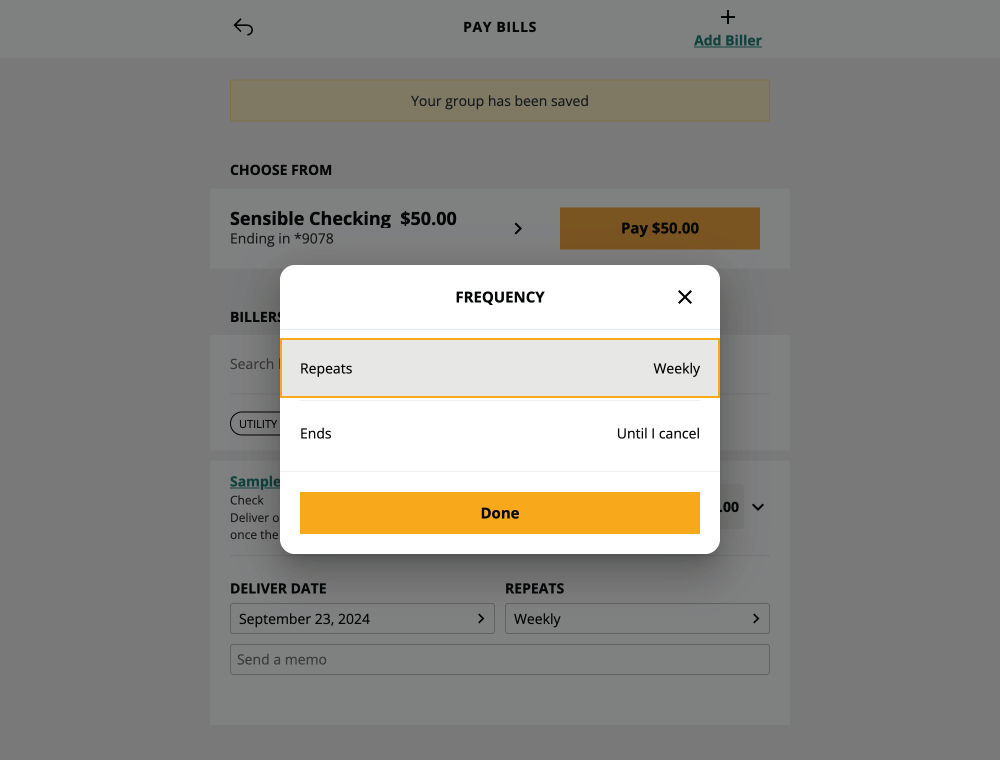
6. Click Pay.
1. Go to the Activity tab to view your scheduled payments. Select the scheduled payment you want to edit. This will take you to the Payment Details page.
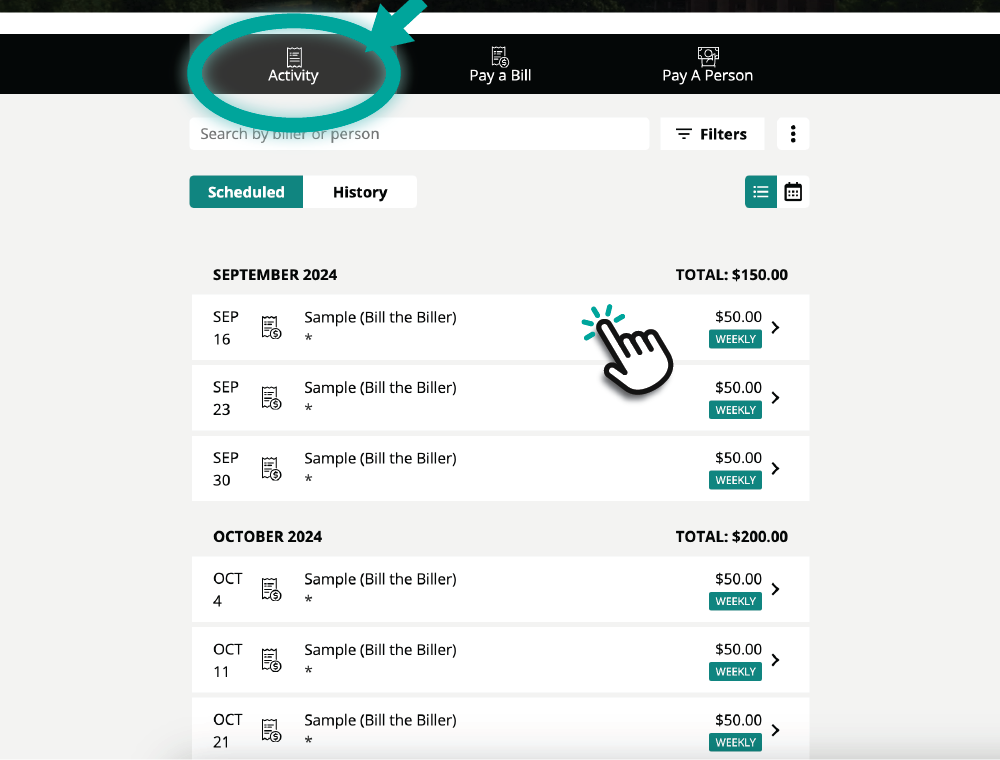
2. To make edits the payment, click the gold Edit button at the bottom.
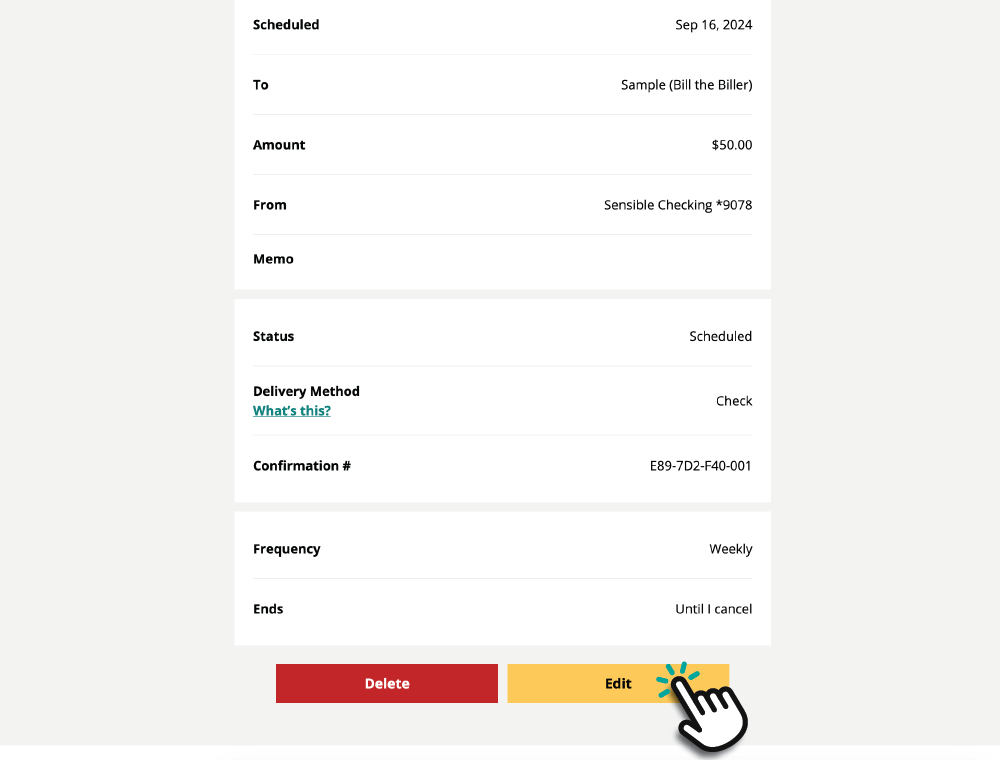
3. To change the scheduled date, select the box underneath Deliver Date and select a new date. Click Done.
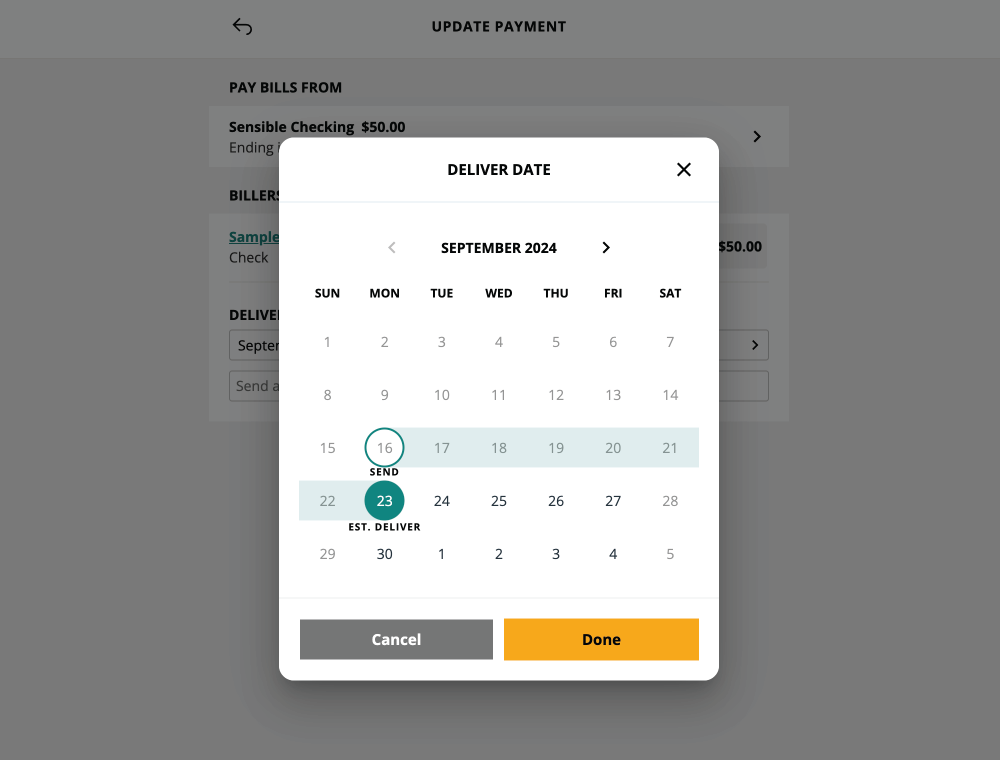
4. Review your payment information and click Save Changes.
5. If you’d like to cancel the payment, select Delete at the bottom of the Payment Details page.
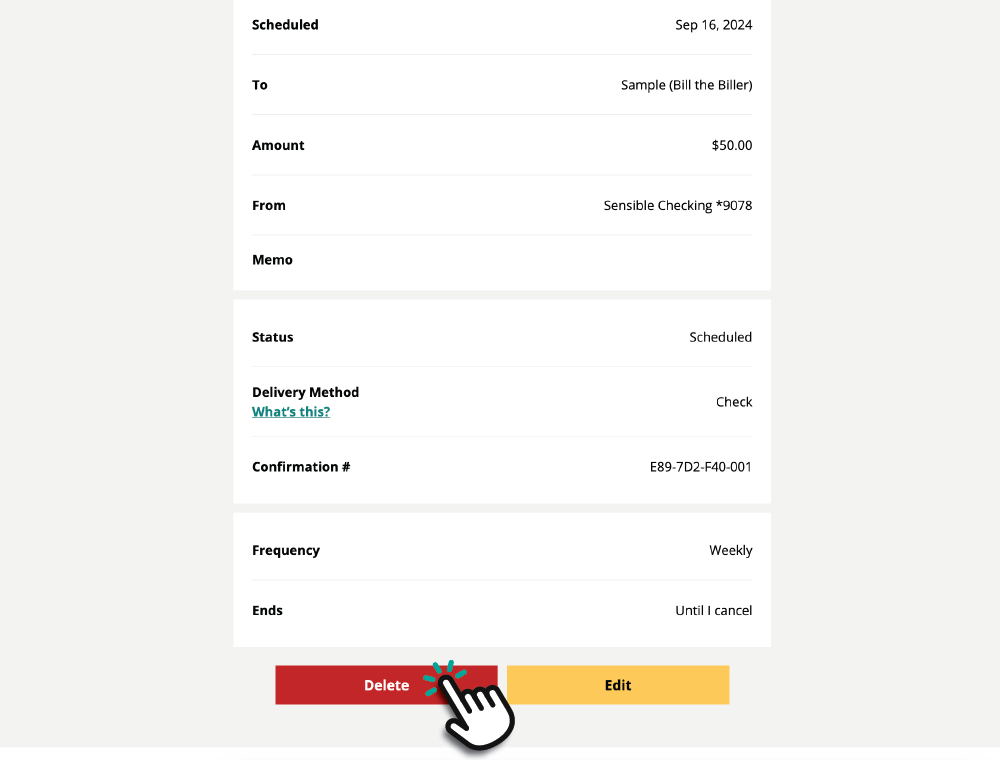
1. Go to the Activity tab at the top of the module. Then click the three dots on the right and select Settings.
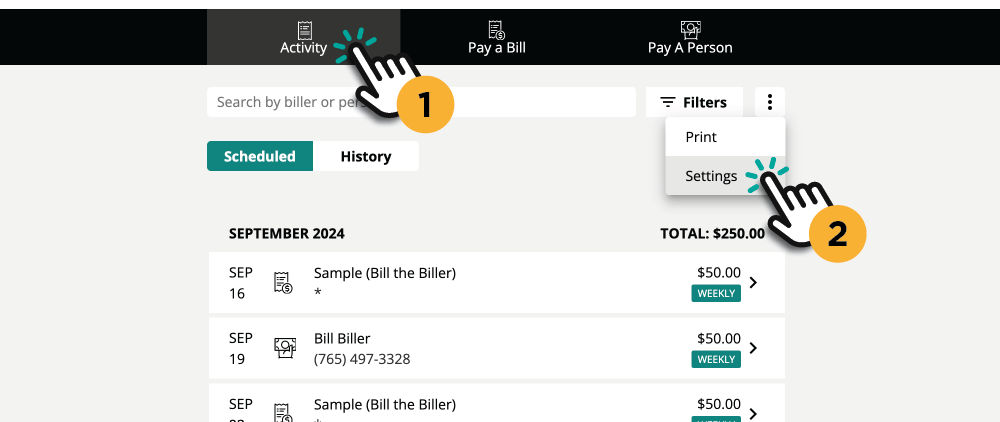
2. Select either Pay a Bill or Pay a Person.
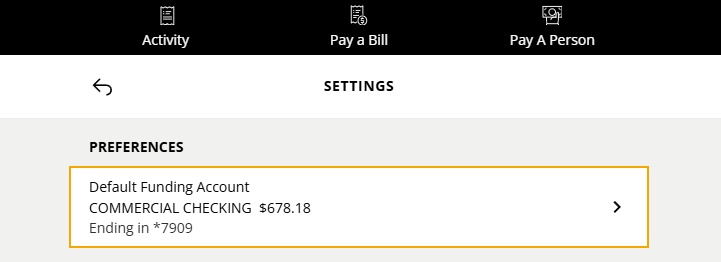
3. Under Preferences, click Default Funding Account and select your desired account.
1. Go to the Activity tab at the top of the module. Then click the three dots on the right and select Settings.
2. Select either Pay a Bill or Pay a Person.
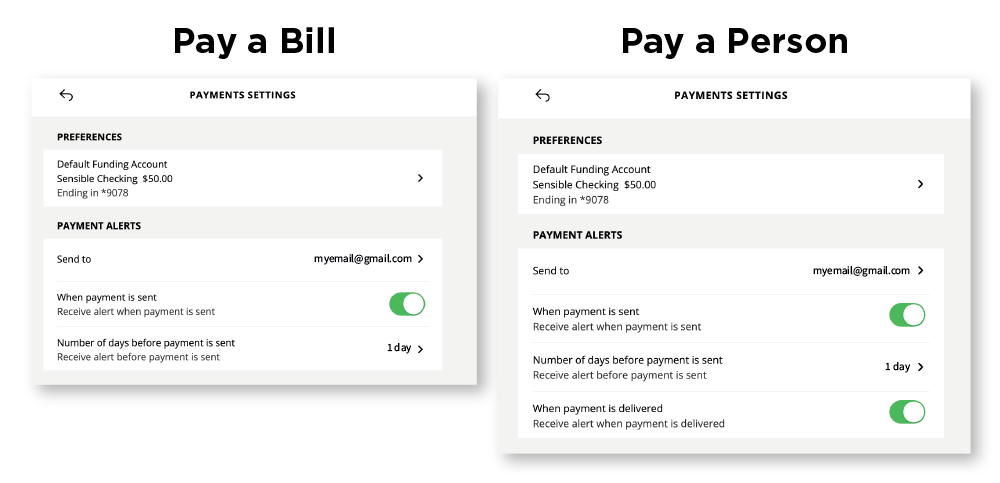
3. Under Payment Alerts, make your selections.
Old alerts set up before October 22, 2024
Any alerts you've set up before October 22, 2024 will continue to be sent to you as usual. If you need to change or delete one of these old alerts, please reach out to us at 800.627.3328. We're here to help!
You can print off a proof of a payment for your own records or to provide to billers.
1. Navigate to the Activity tab. Click History.
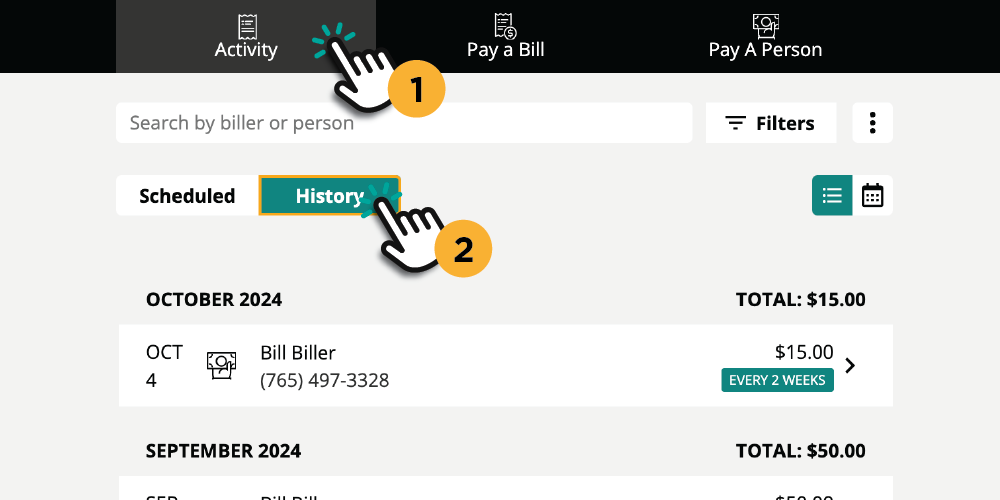
2. Find and select the payment you want a Proof of Payment for. This will take you to the Payment Details page.
3. At the bottom of the page, click Proof of Payment.
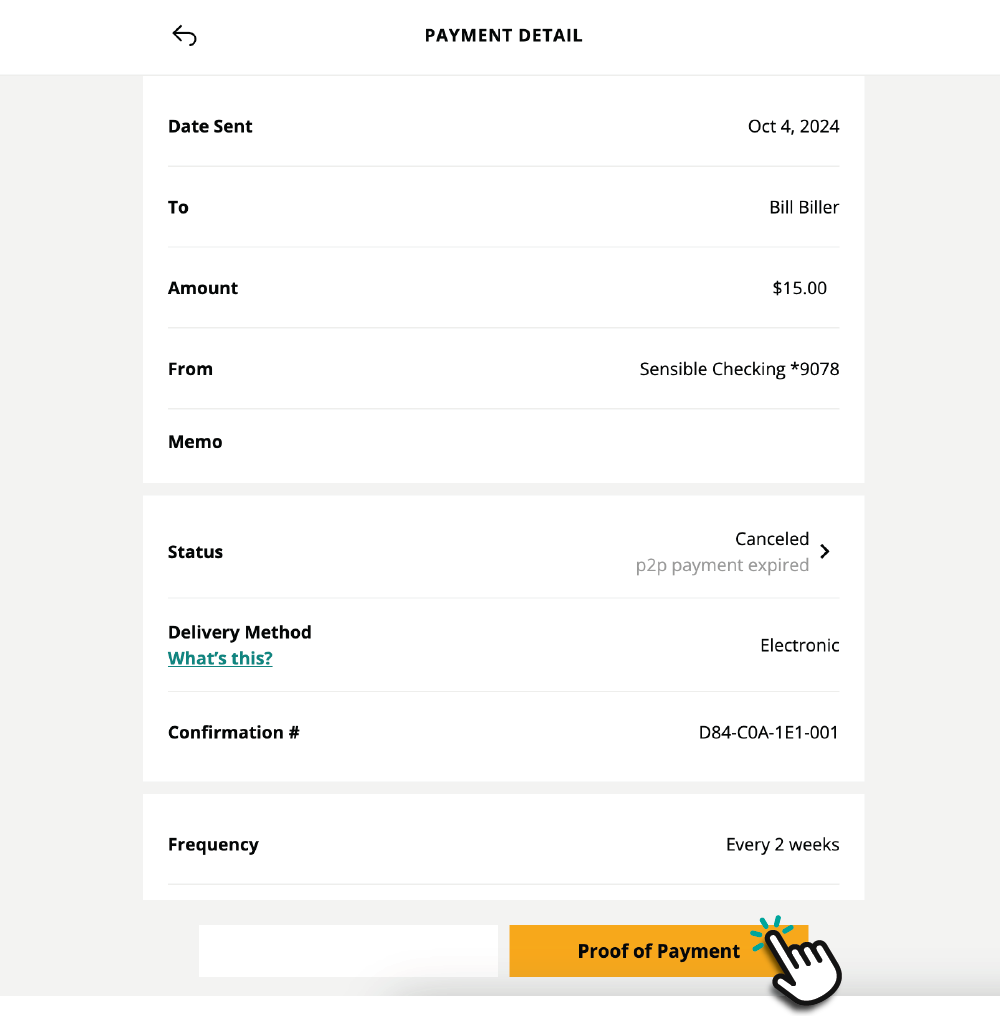
4. Click Send to Print.